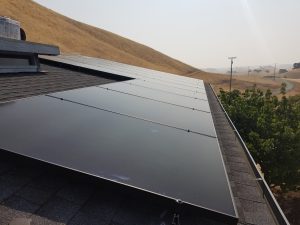
Photo Credit: Del Sol Energy
A major ‘first’ question that customers ask after exploring various energy companies, selecting their solar panels and becoming committed to using solar energy, is “How long does it take to install solar panels?” With the excitement of the solar project and the soon-to-be financial savings of the newly installed solar system, the install process is where consumers are full of questions. This article will briefly explore the solar panel installation process.
Pre-Install Steps
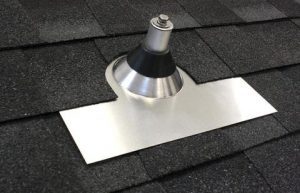
Photo Credit: GoGreenSolar
Solar panels, on most residential jobs, only take a few days to install. However, there are important steps that must be completed before the installation can actually begin.
- Site Evaluation: Before an install can begin, a site evaluation is important. This short visit from your solar installation team will provide information regarding the quality of the roof rafters and ensuring the solar design is the ideal design for your home, based on environmental factors such as shading, trees, and other buildings.
- Scheduling: As soon as your roof has been cleared for the project to begin, the solar installation company will work closely with their logistics team to schedule your install. The majority of the work is completed on the exterior of your home and you are not required to be present as they complete their work.
- Permitting: Before the actual construction process can begin, permits from the city of county will need to be secured. These permits ensure that the installer is following all building codes and building best practices. The cost of permitting is rolled into the cost of the solar system and the installer is responsible for obtaining them from the city.
Install Process
As soon as the ‘pre-install’ work is completed, the actual installation of your panels can begin. This process typically takes between 2-3 working day.
- Setting up the frame with the system’s mounting and racking systems: The first step of the installation process is having the system mounting and racking system attached securely to the roof. This framing ensures that the weight of the solar panels is evenly distributed on your roof, and your roof itself, is protected.
- Attach the solar panels to the frame: The actual attachment of the panels to the racking and mounting systems generally happens on Day 2 of an installation. Panels are secured firmly to the racking system.
- Wire panels together with power inverter and/or a battery storage device: The final step is to wire the panels together to facilitate the transfer of electricity. The panels are also wired to the inverter so the AC currents your panels produce are converted into DC current, that your home can actually use. This is also the step where a battery system is wired if, if homeowners made the choice to include battery storage to their solar system.
Post-Install Processes
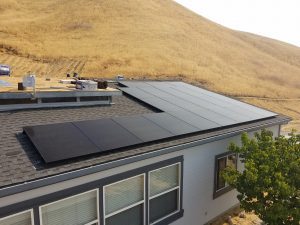
Photo Credit: Del Sol Energy
- Post Install Evaluation and Sign-Off: Upon completion of the installation, a city or county assessor visits the house to ensure the solar panels have been safety and correctly mounted on to a roof and the electrical components are wired accurately.
- Permission to Operate: As soon as city and/or county approvals are given, your solar installation company can be officially connected to the grid through a process referred to as “Permission to Operate” or PTO.
- Set up on 24-hour monitoring: After your system is set up, producing energy and connected to the local energy grid, it is time to set up monitoring. 24/7 monitoring allows you keep a close on the production of your panels.
The physical installation of your solar system typically is somewhere between 2 and 3 days. However, much of the work happens before the system is installed on your roof, or after final approvals are given by the city, country or local jurisdiction. Most local installers will take care of the work from Pre-Install, through the Install Process, until the end at Post-Install. They work to make the process as simple as possible for the homeowner.
If you have more questions regarding local solar installers, please reach out to one of our Energy Adviser’s today.

Leave a Reply